Monday, December 5, 2011

Jelly Filled Doughnuts

I feel sort of bad for these doughnuts because I had a rotten attitude towards them from the beginning. I wasn't sure if I was making them right or not, or if they were turning out. I just recently started baking with yeast. It seems that every recipe's ingredients are somewhat similar, but the outcome is so drastically different. I'm just inexperienced in the dough making field I guess. Well, turns out I had nothing to worry about because they worked great, but I was a jerk towards them until I was able to taste one. I like having spoilers for a few things in my life. I like spoilers during bad romantic comedies, action movies and I like them while I'm baking with yeast. I enjoy knowing what's coming next, especially when I have invested 6 hours into one recipe. 
These doughnuts looked soooo easy in this month's issue of Food Network Magazine. Some guy, named Chuck, said to, 'Try this at home...'. I'm sure Chuck is a really nice guy, but I don't totally trust him yet. His instructions were very vague and I kept worrying throughout the process if what I was doing was right. There was no reassurance with Chuck's instructions, and I guess that's what I needed. There were many pictures along with his recipe, but I like words. Just sayin'. I truly enjoy all the extra fluff some people put into their recipes. You know, the drawn out paragraphs and such. I think that's why I really love Cook's Illustrated Magazine.  They write down every possible step there ever could be. I realize that for some recipes that it's unnecessary, but when you're dealing with a gallon of hot grease on your stove top, you should probably know what the hell you're doing. I may or may not try this recipe again. Maybe now that I know what to expect, I'll be a little more excited to make these.  I'm going to leave you with Chuck's parting words dealing with this recipe, "Try these with whatever fillings you have on hand, like peanut butter and jelly. Or use Nutella-it's the bomb." Oh, OK Chuck. I'll do that.

Jelly Filled Doughnuts
Recipe from Chuck Hughes, Food Network Magazine

Ingredients:
1 cup warm milk
1 teaspoon active dry yeast
1/4 cup granulated sugar
1/2 teaspoon salt
1 teaspoon vanilla extract
2 large eggs
2 to 2 1/4 cups all-purpose flour, plus more for dusting
4 tablespoons unsalted butter, cut into pieces and softened
Vegetable oil, for brushing and deep-frying
Jelly or jam, for filling
Confectioners' sugar, for dusting

Directions:
1. Pour the warm milk into the bowl of a stand mixer. Sprinkle the yeast on top and stir to dissolve; let stand until foamy, about 5 minutes.


2. Add the sugar, salt, vanilla and eggs to the bowl and whisk until blended. Add 2 cups flour and mix with the dough hook to combine, stopping to scrape down the bowl. (The dough will be stick; if it's too wet, add the remaining 1/4 cup flour.) Add the butter and mix until smooth.


3. Brush a large bowl with vegetable oil; add the dough and cover with plastic wrap. let rise in the refrigerator, at least 4 hours or overnight.


4. Line 2 baking sheets with parchment paper and dust with flour. Dust a clean surface with flour; turn out the dough onto the surface. Dust the dough with flour, then gently pat it out to make it easier to roll. Using a rolling pin, roll out the dough until about 1/2 inch thick. Cut the dough into 1 1/2-inch rounds with a cookie cutter; transfer to the prepared baking sheets. Re-roll the scraps and cut out more rounds. Dust the dough rounds lightly with flour, cover with plastic wrap and let rest 1 hour in a warm place.


5. Heat 2 to 3 inches vegetable oil in a large pot until a deep-fry thermometer registers 360 degree. I used a candy thermometer, worked out fine. Working in batches, fry the doughnuts, turning, until golden brown, 1 to 1 1/2 minutes total. Using tongs or a skimmer, remove to paper towels to drain.


6. Fit a pastry bag with a 1/8-inch round tip; place the bag in a glass and cuff the open end over the glass. Fill the bag with jelly. Insert the pastry tip into the side of a doughnut and gently squeeze to fill repeat with the remaining doughnuts. Dust with confectioners' sugar and serve warm.


*I used my homemade strawberry jam for the filling, but you can use any flavor you'd like. Also, I skipped the jam for some of them and just used confectioners' sugar to roll them in. I'd almost say just the sugar ended up tasting the best, but that's just me. Enjoy!

Monday, November 28, 2011

Cinnamon-Pear Cheesecake


Along with my traditional Thanksgiving pies, I decided to make something that was a little different this year to go with them. This particular cheesecake appealed to me because there was a layer of pears on the bottom and a layer of sour cream on top. Yup, sour cream is what actually sold me. Don't judge. Actually, whenever I see/eat sour cream I think of my youngest brother, Randy. When it's available at our family meals, he eats so much it would possibly make you gag. It's as if he has the last container of sour cream on Earth, and if it all doesn't get eaten on top of those enchiladas he is having, the world will end. Silly things like that is why I love my family, which brings me back to Thanksgiving, because I'm thankful for my family.

The original recipe for this cake uses gingersnaps and ginger, but my boyfriend doesn't enjoy the ginger spice, so I swapped it for cinnamon graham crackers and cinnamon instead. Aren't I thoughtful?!  For the most part, this cheesecake is so easy to make. It sits either in the oven or in the fridge for the majority of the time. You do need to think ahead because it's sort of a waiting game. It needs to bake, then cool, and then be refrigerated for at least 4 hours. It really is worth the effort and my only complaint was that the crust was a little difficult to get out of the pan intact, but it might have also been user error, I do tend to mess up from time to time. Shocking, I know. As I said earlier, I used a different type of cookie/cracker for my crust. You could use the original gingersnaps, or try crushed vanilla wafers, honey graham crackers, whatever. This recipe is flexible, and for that reason alone it's a keeper. I hope you get a chance to make this! It's pear season, and you can use any kind. Enjoy!

Cinnamon-Pear Cheesecake

Ingredients

6 tablespoons unsalted butter, melted
1 1/2 cups crushed cinnamon graham crackers
3 ripe pears, any kind!, peeled, cored, and sliced
1/4 teaspoon ground cinnamon
16 ounces cream cheese, at room temperature
1 1/4 cups granulated sugar
2 eggs, large
3 teaspoons vanilla extract
1 cup sour cream, at room temperature

Directions

  1. Heat oven to 350° F.
  2. In a medium bowl, combine the butter and crushed cinnamon graham crackers . Press the mixture into a 9-inch springform pan, working the crumbs over the bottom and then up the sides. Bake for 20 minutes, not any longer. 
  3. In a small bowl, toss the pears and cinnamon. Line the cooled crust with the pears, overlapping the slices slightly. 
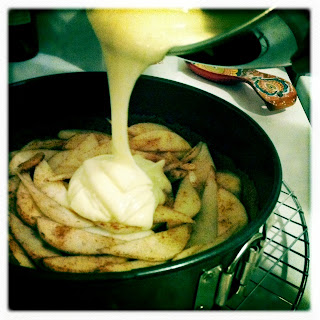
  4. In a large bowl, beat the cream cheese for 2 minutes. Add 1 cup of the sugar and beat for 2 minutes. Add the eggs, 1 at a time, and mix until combined. Stir in 2 teaspoons of the vanilla. Pour the mixture over the pears. 
  5. Bake until the top is barely set but still a little wibbly wobbly, about 50 minutes. Transfer pan to a wire rack but leave oven on.
  6. In a small bowl, combine the sour cream and the remaining sugar and vanilla. Pour over the cheesecake and bake for 8 minutes. Transfer to a wire rack and cool to room temperature. Cover and refrigerate for at least 4 hours before serving.

Tuesday, November 22, 2011

Cranberry Spice Cake


In case you were wondering, five pounds of cranberries is a lot. Seriously, trust me. I let a sweet, little older lady talk me into getting five pounds of cranberries at her cranberry bog earlier this fall, and she had me leaving thinking it was a great idea. What was I thinking? I, of course, needed to use every last one of those cranberries as if wasting any of them would somehow harm the elderly woman. I did it, I succeeded. I used that entire bag of fresh cranberries before they went bad, which was about three weeks. I managed to make cakes, breads and jam out of that giant bag of cranberries.. I'm not complaining, it just always sounds like I am. Those were some amazingly fresh cranberries. Right off the bog, can't beat it.


Until last month, I had never been near a cranberry bog. Well, without knowing it anyway. I was driving in Wisconsin with three other ladies and there was a sign for "Fresh Cranberries". I wanted to stop, wait, I needed to stop. I thought it would end up being some guy standing behind some sort of table handing out cranberries for an absurd amount of money. I was completely wrong. About a half of a mile down the road from the sign was an insanely beautiful cranberry bog. We just happened to be at the right place at the right time. Apparently if we would have gotten there an hour later there wouldn't even have been a cranberry in sight. They were shipping them off. This is where the older woman comes in, lets call her Inga. Well, Inga is quite the business woman. She had her shop set up in an old shed and she knew her cranberries. In fact, she has her own cookbook. Which, by the way, three of us bought for $3. Thanks, Inga. I have to admit, I haven't made anything from her cookbook, but the pictures are beautiful.


I really enjoy baking with cranberries. In fact, it's one of my favorite things to bake with. Fresh cranberries are only around for a very limited time and I can't stop using them while they are here. I made a cranberry spice cake that I, and my guests, enjoyed very much. To me it almost tastes more citrus-y than spicy, but either way it's delicious. The lemon glaze is swell. 'Tis the season, enjoy the fresh cranberries while you can.

Cranberry Spice Cake

Cake:
1 1/2 cups all-purpose flour
3/4 teaspoon cinnamon
3/4 teaspoon salt
1/2 teaspoon ground cardamom
1 teaspoon baking powder
1/2 teaspoon baking soda
2 cups fresh cranberries
2/3 cup sugar
2/3 cup packed dark brown sugar
1/2 cup vegetable oil
2 large eggs
1/2 cup sour cream
1 tablespoon freshly grated orange zest
2 teaspoons freshly grated lemon zest
1 teaspoon vanilla extract
1/3 cup apple cider

Lemon Glaze:
1 cup powdered sugar
2 teaspoons freshly grated lemon zest
3 tablespoons lemon juice
1/8 teaspoon salt

Cake: Preheat oven to 350 degrees. Coat bottom and sides of cake pan with nonstick spray. Line bottom with parchment paper and coat paper with spray. Whisk flour and next five ingredients in a medium bowl and set aside. Pule cranberries in a food processor until finely chopped but not pureed, set aside.

Stir sugar, brown sugar, and oil in another medium bowl to blend. Add eggs one at a time, stirring to blend between addition. Whisk in sour cream, orange zest, lemon zest, and vanilla.

Whisk in dry ingredients in 3 additions, alternating with cider in 2 additions and whisking to blend. Fold in chopped cranberries. Scrape batter into prepared pan; smooth top.


Bake until tester inserted comes out clean, about 1 hour to 1 hour 10 minutes. Transfer pan to a wire rack; let cake cool in pan for 15 minutes. Run a knife around inside of pan to release cake. Turn out cake onto rack. Peel off parchment paper, then flip cake and let cool for 20 minutes.


Lemon Glaze: Whisk powdered sugar, lemon zest, lemon juice, and salt in a small bowl. Spread glaze over warm cake, allowing it to drip down sides. Let stand until glaze becomes crackly, about 1 hour. Serve at room temperature.


Monday, November 7, 2011

Salty Sweet Peanut Butter Cookies


It's November, which means it's National Peanut Butter Month! I have a few peanut butter facts for you to enjoy. Ok, did you know that it takes about 540 peanuts to make a 12-ounce jar of peanut butter? Fact. By law, any product labeled "peanut butter" in the United States must be at least 90 percent peanuts. Which completely makes sense, by the way. Also, did you know that peanut butter was the secret behind "Mr. Ed," TV's talking horse? Fascinating, I know. AND, the average American consumes more than six pounds of peanuts and peanut butter products each year. Whoa. Peanut butter is one amazing treat.


A few weeks ago, I made homemade peanut butter out of Minnesota peanuts and I mostly wanted that peanut butter for baking.  I got to make a type of peanut butter cookie out of that jar of peanut butter and I was very please with the results. I was a little nervous about baking with it because I had never used homemade peanut butter in any sort of recipe before, but it held up amazingly well. I also used some of the leftover peanuts in these cookies as well. I want to say these cookies were better than any peanut butter cookie I'd ever had because I used the freshest main ingredient I could get. Even if you don't make your own peanut butter, I think you will completely love these cookies. I'll definitely make them again. Enjoy!

Salty Sweet Peanut Butter Cookies
Adapted from Smitten Kitchen

1 1/4 cups all-purpose flour
3/4 teaspoon baking soda
1/2 teaspoon baking powder
1/4 teaspoon salt
1/2 teaspoon cinnamon
1/2 cup unsalted butter
1 cup peanut butter
3/4 cup sugar
1/2 cup brown sugar
1 egg
1 tablespoon milk
1 teaspoon vanilla
1/2 cup chopped peanuts
1/2 cup chocolate chips

*1/4 cup sugar for rolling
*Sea Salt for sprinkling

Directions:


Preheat oven to 350 degrees. In a large bowl, combine the flour, the baking soda, the baking powder, cinnamon and the salt. Whisk together and set aside.


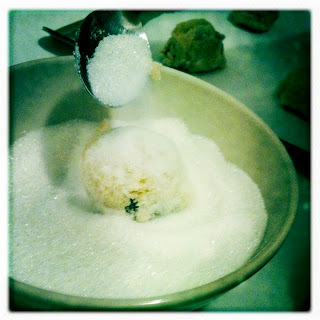
In a large bowl, beat the butter and the peanut butter together until fluffy. Add the sugars and beat until smooth. Add the egg and mix well. Add the milk and the vanilla extract. Add the flour mixture and beat thoroughly. Stir in the chopped peanuts and chocolate chips. Put the leftover 1/4 cup sugar in a small bowl. Drop by rounded teaspoonfuls into the sugar, roll around until coated, then place onto cookie sheets. Using a fork, lightly indent with a criss-cross pattern, but do not overly flatten cookies. Sprinkle lightly with sea salt. Bake for 10 to 12 minutes. Do not over-bake. Cookies may appear to be underdone, but they are not.

Cool the cookies on the sheets for 1 to 2 minutes, then carefully remove them to a rack to cool completely.


***I was recently interviewed about my peanut butter making and if you are interesting in listening you can check that out HERE.  If for some reason this link doesn't work, email me at: nimmowblog@gmail.com and I will personally email you the link. Thanks!

Monday, October 31, 2011

Candy Corn Sugar Cookies


Happy Halloween! If there was one thing my parents always had in the house on Halloween it was candy corn. I hate admitting this, but I actually love the stuff. Every year I talk about how disgusting those little candies are and then I actually eat one and I am once again hooked. Immediately. I found out some candy corn trivia today, and apparently it has been around since the 1880s, and it was the created by the same company that ended up creating the Jelly Belly jelly bean. Yup, I'm always full of useless information, but I bet you feel good knowing that by buying that candy corn you are keeping up a tradition.  My mother always put our candy corn in a dish next to those disgusting waxy type sugary pumpkins. You know the ones, right? They are about the size of a quarter, and orange with a little green top. I think they are made out of almost the same exact type of sugar mess that the candy corn is made out of, but six times the size and after eating one your teeth have a coating on them. They also don't really have a flavor. At all. I don't recommend the pumpkins, but to be honest, I think those were my mom's favorite.

Somebody is loving on these candy corns because they sell about 9 BILLION kernels every year. I contributed this year because we have around 100 kernels in our house. Who knew that candy corn was such a gold mine?! Anyway, I decided to use this tiny treat in my Halloween cookie this year. The Candy Corn Sugar Cookie was Martha Stewart's Cookie of the Day, and now it is also my cookie of the day. I hope you have a safe and fun Halloween and maybe you can use your leftover candy corn with these cookies. They are quite tasty and come in two easy flavors.  Enjoy and here is the recipe:


Candy Corn Sugar Cookies 

Recipe from Martha Stewart cookie of the day

 Ingredients

4 tablespoons unsalted butter, very soft
1/2 cup sugar
1 large egg yolk
1/4 teaspoon vanilla extract
1/4 teaspoon baking powder
1/4 teaspoon salt
3/4 cup all-purpose flour, (spooned and leveled)
About 36 candy corns

Directions

Preheat oven to 350 degrees. Place butter and sugar in a medium bowl; beat until combined. Beat in egg yolk, vanilla, baking powder, and salt. Add flour, and mix until a dough forms. It will be quite crumbly.


Scoop out teaspoons of dough, and roll into balls. Place balls on baking sheets, 2 inches apart.


Bake, rotating sheets halfway through, until edges are firm and cookies are dry to the touch. They will also crack a little on the sides. 10 to 12 minutes.

Remove from oven; gently press a candy corn into center of each cookie (surface of cookies may crack slightly). Cool on sheets 1 minute; transfer to a rack to cool completely.

*Chocolate Variation: Reduce the amount of flour given in the recipe to 1/2 cup. Add 1/4 cup unsweetened cocoa powder along with the flour in step 1, and proceed.