Tuesday, August 21, 2012

Roasted Red Salsa. Hot hot hot! Or not, it's really up to you.


Whoa! Summer is almost over. I realized this because the Minnesota State Fair starts this week, which means it's almost Labor Day, which means school starts soon in Minnesota. It all comes together nicely, doesn't it? The other fantastic thing that's happening this time of year is the abundance of tomatoes at the farmers markets and in personal gardens. Beware because I'm about to brag... the first picture below is a sample of my personal garden success. My first garden! It's pretty rad, right? I think so!


As I was saying, before the bragging began, the abundance of tomatoes present in Minnesota right now is awesome. I have found several tomato recipes that I'm going to be testing out in the next several days, but after getting my first of many Minnesota tomatoes several weeks ago, I chose to make salsa. In fact, I have made this salsa several times and so has my sister after telling her how good it was. If you don't like spicy foods this salsa might not be for you, but you can also adjust the spice of the salsa to your liking. I hope you get a chance to make this. It has honestly become one of my personal favorites.


Roasted Red Salsa

15-20 full size Roma tomatoes
2 large or 3 medium yellow onions
15-20 Serrano peppers* (the amount you choose depends on the level of spice you'd like)
8-10 garlic cloves
2 tablespoons sea salt

Directions:
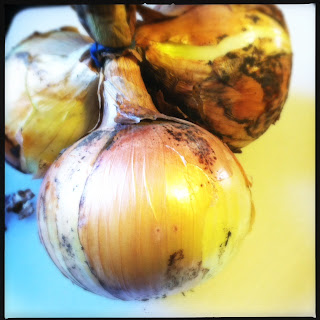
Preheat your oven to 375 degrees. Slice tomatoes, onions and peppers in half and put on cookie sheet with garlic. Place items cut side up on the pan.

Roast vegetables for about 30-45 minutes until onions are soft and translucent. The peppers should be charred a little as well as the tomatoes.

Cool vegetables slightly after taking them out of the oven. Put roasted items and salt through a food processor or blender and blend until completely smooth. I have a smaller food processor so I did it in several batches and then mixed them all together when I was finished.

This recipe makes several cups worth of salsa and make sure you keep it refrigerated. Enjoy.


*WARNING: When slicing the hot peppers please wear rubber gloves. Don't be a hero.


Sunday, July 22, 2012

Cherry Galette


An abundance of cherries I did have. My eyes were larger than my stomach when I bought them all. I wasn't quite sure what to bake with the extras I had since I rarely bake with fresh cherries. The pitting and the mess are somewhat annoying to me. Even though I have one of those fancy pitters with a splash guard, the juice still tends to splatter quite a bit. Okay, I'll stop complaining about a little juice splatter. This galette ended up being worth the tiny inconvenience of the cherry juice mess. 

Last weekend I made my first galette and I haven't been able to get it out of my head. This particular galette was a savory one that smelled and tasted fantastic, but I figured a sweet one would taste just as swell. This particular cherry recipe ended up being pretty juicy and leaked a bit onto the pan. So, make sure you use a pan with somewhat of a siding on it so it doesn't leak all over your oven. It will make your life easier. Also, let the galette cool completely so the filling can set and be easier to slice. I hope you get a chance to make this cherry galette or any kind of galette for that matter. You won't be sorry! Enjoy.

Cherry Galette

Instructions:

For the galette
1 cup all-purpose flour
2 tablespoons granulated sugar
1/4 teaspoon kosher salt
1/4 pound (1 stick) cold, unsalted butter diced
2 tablespoons ice water

Cherry filling:
3 1/2 cups pitted fresh cherries
4 tablespoons cornstarch
2/3 to 3/4 cup sugar (adjust this according to the sweetness of your cherries)
1/8 teaspoon salt
1/2 tsp cardamom
1 tsp lime
1/4 teaspoon almond extract
1 tablespoon cold unsalted butter, cut into small bits

Egg wash:
1 egg, beaten with 2 tablespoons water
sanding sugar, optional

Directions:

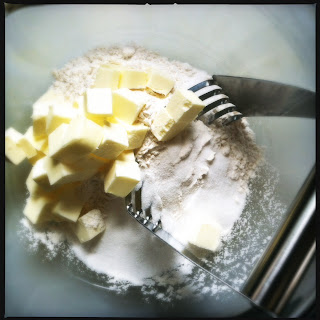
Make the dough: Whisk together the flour, sugar and salt in a large bowl. Sprinkle bits of butter over the flour mixture and using a pastry blender, cut it in until the mixture resembles coarse meal, with the biggest pieces of butter the size of small peas. Add ice water and with your fingertips, mix in the liquid until large lumps form. Pat the lumps into a ball. Cover with plastic wrap and refrigerate for at least 1 hour.


Cherry filling: Stir together the cherries, cornstarch, cardamom, sugar, salt, lime and almond extract gently together in a large bowl.


Prepare galette: Preheat your oven to 400 degrees. On a floured work surface, roll the dough out into an 11-inch round. Transfer to a parchment lined baking sheet. Spread the cherry mixture around on the galette leaving a 2-inch border. Fold the border over the filling, pleating it to make a circle. The center of the galette will be open. Brush the crust with the egg yolk glaze and sprinkle with sanding sugar if you wish to, which I did.


Bake the galette until it's golden brown, 30 to 40 minutes. Remove from the oven, let stand for about 20 minutes, then slide the galette onto a serving plate. Cut into wedges and serve at room temperature.

Sunday, July 15, 2012

We all scream. Ice cream.


It's that time again. The third Sunday of July is here, which means it's National Ice Cream Day. Last year at this time I was sweating uncontrollably and shaking my ass off making homemade ice cream in a bucket with ice. This year I'm sitting in our comfortably air-conditioned home using an electric ice cream machine. Life is grand sometimes, isn't it? Just so you know, I'm somewhat addicted to my new fancy machine. All you have to do is flip a little switch and it churns the ice cream for you. Genius.

I had this new fancy machine on my hands which meant I needed to find a recipe book. Well, I have found the ultimate ice cream book, man. I have made at least 6 recipes from this particular book and there is no stopping me. I've set a goal to try and make every single one of these ice creams and I couldn't be more excited. Yes, I do realize I'm a giant nerd. Anyway, this book, Jeni's Splendid Ice Creams at Home, categorizes all of the ice cream recipes into groups of the seasons and it includes recipes for waffle cones, which hopefully will be happening for me sometime soon. I just need that waffle cone iron....one day my friend, one day.

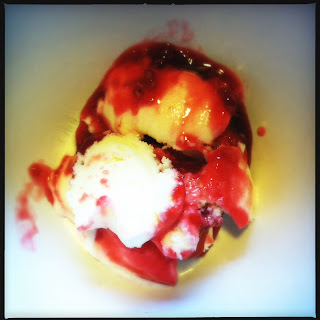
Recently I made a beet and poppy seed ice cream as well as a sweet corn and raspberry sauce ice cream and have a few photos to share. I'm also going to share the base ice cream recipe for this book and a link to Saveur magazine which has several links to a few of her recipes. The two I made are both listed on this site so you should take a look!

Jeni's Ice Cream Base

INGREDIENTS
2 cups milk
4 tsp. cornstarch
1 1/4 cups heavy cream
2/3 cup sugar
2 tbsp. light corn syrup
1/4 tsp. kosher salt
3 tbsp. cream cheese, softened

Directions for homemade ice cream:

In a bowl, stir together 1/4 cup milk and the cornstarch; set that mixture aside. In a medium to large size saucepan, whisk together the remaining milk and the cream, sugar, syrup, and salt. Bring this to a boil over medium-high heat. Cook for 4 minutes and stir in milk and cornstarch mixture. Return to a boil and cook, stirring, until thickened, about 2 minutes. Place cream cheese in a bowl and pour in 1/4 cup hot milk mixture; whisk until smooth. Then whisk in remaining milk mixture. Pour mixture into a plastic bag and seal, and put into a bowl of ice water until chilled, about 30 minutes. Pour mixture into an ice cream maker and process according to your manufacturer's instructions. Transfer ice cream to a storage container and freeze until set, around 4 hours. Makes about 1 quart.

Just a note, when you pour the ice cream mixture into the ice cream maker you can add to it. Chocolate chips, herbs, candies and nuts. Whatever you desire on/in your ice cream will work.

Best of luck.


p.s. my friend, Reba, took that picture on the top of my post. It was rad so I asked to use it.

Tuesday, May 22, 2012

Citrus Buttermilk Sheet Cake with Duck Eggs


Yesterday was my birthday and I decided to bake myself a cake. I still have the dreaded ‘tiny oven’, so I chose a boring sheet cake instead of a pretty layered one. Poor me, I know. This wasn’t just any sheet cake though, it was made with fresh duck eggs. There is a rad little family I know that has ducks and chickens in their backyard and they donated some fresh duck eggs to my kitchen. Thank you, friend Oliver! You may be asking yourself, ‘what’s the big deal with duck eggs?‘. I didn’t know either until last year when I read about the benefits of baking with them. These eggs have more protein than chicken eggs do, which gives them more structure when cooked. Extra protein creates more loft in cakes which makes it so much better! Isn’t it wonderful?! Using duck eggs in your baked goods results in fluffier, moister and richer cakes than those made with chicken eggs. Jamie Oliver told me this and I totally believe him. Just in case you don’t have the faith in Jamie Oliver that I do, there are a few other websites that talk about the benefits of using these eggs in your cakes and I will post the addresses at the end of my rant if you want to learn more.


I usually buy my duck eggs from Seward Co-op, who actually gets them from LTD Farms, but I was so excited to get my first eggs of the year from my generous friends. It was really cool being able to see the actual ducks that produced the eggs I was about to use. I love the texture, which almost feels waxy to me, and the look of the shell of the duck egg too. They are much thicker and are a little bit more difficult to break into. Since they have a thicker shell it gives them a longer shelf life. Who knew?! You can keep duck eggs for about three weeks in the refrigerator, some can last longer but you just have to check them over. It all depends on the freshness of the egg when you receive it to see how long you can keep it in your refrigerator. Makes sense, right? Once you crack that duck egg open, you’ll notice that the egg white is thicker and the yolk is a super bright yellow. If you have a chance to, I would recommend baking with duck eggs at least once to try it out. I have even tried them in cookies and they worked great.


Back to my birthday cake. I chose this particular cake because it seemed light and fresh. Perfect for a May birthday. We found out that this cake tastes best the day it is made. The next day it gets just a little dry, but it’s still quite edible. On top of this particular cake it has just a simple powdered sugar glaze. The glaze seriously took me about a minute to make with a whisk. One of the best parts of the whole thing is the sprinkle of reserved citrus sugar on top of the glaze. It added a crunch and a little more sweetness to it. This cake would actually be great to bring along to a picnic or something this summer. Super easy to make. Hope you get to give it a shot.

Citrus Buttermilk Sheet Cake
Adapted from Cook’s Country

For the Cake:
2 ½ cups cake flour, sifted
1 teaspoon baking powder
½ teaspoon baking soda
½ teaspoon salt
¾ cup buttermilk, room temperature
3 tablespoons grated lemon and orange zest
¼ cup lemon and orange juice, mixed
1 teaspoon vanilla extract
1 ¾ cup granulated sugar
12 tablespoons unsalted butter, room temperature
3 large eggs plus 1 large yolk, room temperature OR 3 duck eggs

Glaze:
3 cups confectioners’ sugar
3 tablespoons lemon juice
2 tablespoons buttermilk

Directions for Cake:
Preheat the oven to 325 degrees. Butter a 9X13-inch baking dish. Sift flour baking powder, baking soda, and salt together in a bowl. Combine buttermilk, lemon/orange juice, and vanilla in a small bowl or liquid measuring cup.


Using your mixer, beat granulated sugar and lemon/orange zest on medium speed until moist and fragrant, about 1 minute. Transfer ¼ cup of the sugar mixture to a small bowl and cover it for later use. Add butter to remaining sugar mixture and beat until light and fluffy, about 2 to 3 minutes. Beat in eggs and yolk, one at a time. Mix each egg until incorporated. Make sure your mixing speed is on low and then add flour and buttermilk mixtures alternating between the two beginning and ending with the flour. Mix until smooth, but don’t over mix.


Scrape batter into buttered baking dish and smooth out the top. Bake about 25-30 minutes until cake is golden brown or toothpick inserted comes out clean. Let cool on wire rack for at least 10 minutes.


Directions for Glaze:
Whisk confectioners’ sugar, lemon juice, and buttermilk together until smooth. You may have to add a little extra lemon juice to make it a little more runny. I did. Gently spread glaze over warm cake and sprinkle evenly with your reserved citrus sugar mixture. Let cool completely, at least 2 hours. Serve when ready!


Resources for learning about duck eggs:

Urban Homestead

Local Harvest

Friday, May 11, 2012

Cake and Pie for Pa


It’s been a busy last few weeks. My god. It’s not that I’ve been slacking in the baking department, it’s that I’ve been slacking in the ‘sharing the recipes with you’ department.  Last weekend we went to North Dakota to celebrate my father’s 60th birthday and I made way too many desserts. If you know me at all that probably wouldn’t surprise you very much. Go big or go home, right?? My dad only turns 60 once, ya know. I made my dad a silly cake, well, several silly cakes, but one in particular that is my favorite kind of birthday cake to make. The recipe's turned out every single time I’ve made it, which has been many. Also, I made the actual cake layers on Thursday and we ate them on Saturday and you never would have known. It stayed so fresh and it was durable! It traveled extremely well. I just wrapped  the layers separately and several times in plastic wrap and that’s it. I was so nervous about traveling with the cake layers but it couldn’t have worked out any better. To decorate the cake I used a simple vanilla butter cream frosting and just dyed it blue. The cake itself was citrus-y and pretty dense. It’s a very filling cake and can feed several people if you cut the slices an appropriate size, but you don’t have to do that either.

My father dislikes cake, quite a bit actually. I know, he’s crazy. So, I also made him a pie as well. I cheated and used a Pillsbury already made crust, I was in a time crunch, people! I decided on a Rhubarb-Strawberry pie. I was selfish and made one of my personal favorites. It was pretty delicious, I’m not going to lie. I don’t have many pictures to share with you in this post so I thought I would share two recipes to make up for it. The delicious pie and the delightful cake. I hope you enjoy and get a chance to make at least one of them. I’m hoping to post more rhubarb recipes in the near future, it is my favorite seasonal item after all.

Yellow Birthday Cake
Adapted from Barefoot Contessa

18 tablespoons (2 ¼ sticks) unsalted butter, at room temperature
3 cups sugar
6 extra-large eggs, at room temperature
8 ounces (about 1 cup) sour cream, at room temperature
1 ½ teaspoons pure vanilla extract
Zest of ½ lemon and ½ orange
3 cups all-purpose flour
1/3 cup cornstarch
1 teaspoon salt
1 teaspoon baking soda

Preheat the oven to 350 degrees. Butter and flour two 9-inch round cake pans.

To make the cake, cream the butter and sugar on medium-high speed in the bowl of an electric mixer. Beat until light and fluffy, about 5 minutes. On low speed, add the eggs, two at a time, then the sour cream, vanilla and both citrus zests. Scrape down the bowl as needed to make sure it is mixed well. Sift together the flour, cornstarch, salt, and baking soda. With the mixer on low speed, slowly add the flour mixture to the butter mixture and mix just until smooth. Don’t over mix. Pour finished batter evenly into the two pans and tap them on the counter to get rid of any air bubbles.

Bake for 35-40 minutes or until a toothpick comes out clean. Cool in pan for at least 10 minutes before removing from pan.

*note: Ina says to bake with room temperature ingredients. So if her recipe says room temperature in the list she means it. I’ve always listened to that rule and my cake has always turned out. I’d trust her, folks.

Buttercream Frosting


Rhubarb-Strawberry Pie
Adapted from Smitten Kitchen

3 ½ cups rhubarb about 1 ½ pounds, untrimmed), in ½-inch thick slices
3 ½ cups (about 1 pound), hulled and sliced
½ cup granulated sugar
¼ cup light brown sugar
1 tablespoon lemon juice
¼ teaspoon salt
½ teaspoon cinnamon
½ teaspoon cardamom, optional
¼ cup quick-cooking tapioca
2 tablespoons unsalted butter, cut into small pieces
1 large egg yolk beaten to blend with 1 teaspoon water (for glaze)

Preheat oven to 400 degrees. Put pie crust into 9-inch pie plate. I bought my crust but you can make your own using any recipe you may have for butter pie crust.

Stir together rhubarb, strawberries, sugars, spices, lemon, salt, and tapioca in a large bowl. Pour filling into the bottom pie crust and dot with unsalted butter. Lay the top layer crust on top of filling mound and cut slits in it to let out the steam.

Transfer pie to baking sheet and brush with egg yolk mixture over dough. I also sprinkled a tablespoon of granulated sugar on top of the egg wash to make it a little more decorative.  Bake for 20 minutes at 400 degrees and then reduce temperature to 350 degrees and bake for an additional 30-35 minutes, until the pie is golden and the juices bubble visibly. I put my pies in the middle rack of the oven, I don’t like burnt crust!

Transfer pie to wire rack to cool. Seriously, let this pie fully cool down before you decide to slice it. It takes several hours.

Sunday, April 15, 2012

Old-Fashioned Cupcakes with Buttercream Frosting


I want to share something with you that I stole from my brother's house today that made me incredibly happy.


For me, nothing beats the lilac's smell and it's most definitely my favorite flower. I just wanted to share with you that they are officially out and about. Sniff them while you can people, they aren't here long. If someone wanted to bottle one of the most familiar smells of my childhood it would be the smell of the lilac. My grandparents, who lived across the woods from us, had huge lilac bushes that spread out across the areas on both sides of their driveway. If I remember correctly, my grandfather hated the smell of those flowers, but I can't/couldn't get enough of them.

Getting back on track, I also wanted to share with you my new favorite birthday cupcake! I've made these cupcakes a few times now, and they have turned out every single time. I recently got The Back in the Day Bakery Cookbook and it is awesome. And cute. There are very few cookbooks where I've wanted to bake every single thing in them. This is definitely one of those books for me. The cool thing about these cupcakes is that it's a one bowl kind of deal. Easy clean-up, man. I had never made a cupcake that you mixed the butter in with all the dry ingredients right off the bat. Normally the flour and such is added towards the end. For me, this way makes the baking process that much easier. I love it. I'm not exactly sure how doing it this way benefits the cupcake, but it's working.

After making the frosting that pairs with these cupcakes, I found my new favorite. Holy smokes it's good. This buttercream recipe also makes a ton of frosting so feel free to apply generously on top of each tiny cake. These cupcakes are soft and moist and have a really great flavor. They have a fine crumb and are a little bit messy, but so worth the few crumbs on your shirt when you've finished. I hope you get a chance to make these!

Old-Fashioned Cupcakes with Buttercream Frosting

1 cup whole milk
1 teaspoon pure vanilla extract
1 3/4 cups cake flour
1 1/4 cups unbleached all-purpose flour
2 cups sugar
1 tablespoon baking powder
3/4 teaspoon fine sea salt
1/2 pound (2 sticks) unsalted butter, cut into 1/2-inch cubes, at room temperature
4 large eggs, at room temperature

Directions:

Preheat the oven to 350°F. Line 24 cupcake cups with paper liners.

In a large measuring cup or a small bowl, mix together the milk and vanilla and set aside.

In the bowl of a stand mixer fitted with the paddle attachment, combine both flours, I sifted them, and then the sugar, baking powder, and salt and mix on low speed for 2 to 3 minutes, until thoroughly combined. With the mixer on low speed, add the cubed butter a few pieces at a time, mixing for about 2 minutes, until the mixture resembles coarse sand. There might be a few larger chunks of butter left, but that's OK. With the mixer on medium speed, add the eggs one at a time, mixing well after each addition.

Turn the speed to low, seriously low, and gradually add the milk and vanilla, then mix for another 1 to 2 minutes.

Remove the bowl from the mixer and  incorporate any ingredients that may have gathered at the bottom and sides of the bowl, making sure the batter is completely mixed.

With a large ice cream scoop or spoon, scoop the batter into the prepared cupcake cups, filling each baking cup about two-thirds full. I prefer to use the ice cream scoop, just depends on personal preference.  Bake for 20 to 25 minutes, until a cake tester inserted in the center of a cupcake comes out clean. My oven leans more towards the 25-30 minute mark. So keep your eye on them after 20 minutes or so. Let cool for at least 20 minutes.

Buttercream Frosting
2 sticks unsalted butter, at room temperature
6 to 7 cups confectioners’ sugar
1/2 cup whole milk
2 teaspoons vanilla extract

Directions:
In the bowl of a stand mixer fitted with the paddle attachment (or in a large mixing bowl, using a handheld mixer), cream the butter on medium speed until light and fluffy, 2 to 3 minutes. Add 4 cups of the confectioners’ sugar, the milk, and vanilla and mix on low speed until smooth and creamy, 2 to 3 minutes. Gradually add up to 3 cups more sugar, mixing on low speed, until the frosting reaches the desired light and fluffy consistency, 3 to 5 minutes.

Using a spatula or a butter knife, spread the tops of the cupcakes with swirls of frosting. Top with sprinkles, if desired. The cupcakes can be stored in an airtight container at room temperature for up to 2 days.


Thursday, April 5, 2012

Giant Peep Cake


Sometimes I feel sorry for the Peep. I feel like it's the one Easter candy people love to hate. I was one of those people who hated on the Peep until a while ago after I had actually tried one. It's marshmallow, people. That's all. It just happens to be covered in sugar and have no taste. Three years ago I was with my nephew at the Target in downtown Minneapolis. It was a few weeks before Easter and we were cruising the candy isle because that is apparently what we like to do together. Tommy, my then 8 year old nephew, spotted an entire section dedicated to Peeps and in that section was every color Peep you could imagine. So, naturally, we bought them all. In the end we probably ended up with all of the colors in the rainbow and they all ended up tasting the exact same. I think he was a little bummed to find out that they weren't different flavors, just chemically colored different. I love that kid. When I see Peeps hitting the candy isle every spring I think of Tommy.....and my mother.

My mother is another Peep-eater. Four Easters ago I watched her put one in the microwave first before she ate it. What?? She said it tasted better. First, how can it taste any different? Second, why would someone ever try that out to begin with? But, I guess I shouldn't ask such silly questions. As kids we received Easter baskets from the Easter Bunny every year until we moved out of the house. In those baskets would be a sleeve of Peeps. None of us would ever end up eating them so my mother would have a stack of Peeps to herself by the end of the day. Funny how things work out that way. 

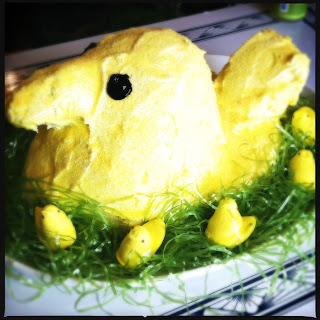
I saw this cake in the new issue of Food Network Magazine and I thought to myself, 'who in the hell would make this?', and that's when I decided that I would be the one. It made me laugh and think of good memories I've had with Peeps, so that's why I ended up wanting to make it. Just because it made me smile. Hope it does the same for you. Happy Easter!

Giant Peep Cake

Yellow Cake
Adapted from Smitten Kitchen
*Food Network used boxed cake mixes. I did not. I like to do things the hard way.
**Note: you have to make two recipes of this cake to complete the peep cake.

Ingredients:
4 cups plus 2 tablespoons cake flour (not self-rising)
2 teaspoons baking powder
1 1/2 teaspoons baking soda
1 teaspoon table salt
2 sticks unsalted butter, softened
2 cups sugar
2 teaspoons pure vanilla extract
4 large eggs, at room temperature
2 cups buttermilk, well-shaken

Cake Baking Directions:

Preheat oven to 350°F. Butter and flour a 9-by-13-inch cake pan plus a 1-quart and 2 1/2-quart ovenproof bowl. Make both cake mixes; divide the batter among the pan and bowls.

Sift together flour, baking powder, baking soda, and salt in a medium bowl. (sifting rocks!) In a large mixing bowl, beat butter and sugar with an electric mixer at medium speed until pale and fluffy, then beat in vanilla. Add the eggs 1 at a time, beating well after each addition. Beat in buttermilk until just combined on low speed. Add flour mixture in three batches, mixing until each addition is mixed in. Don't over mix.

Bake at 350 degrees until a toothpick comes out clean, about 35 minutes for the pan and small bowl, and about 50 minutes for the large bowl. Let the cakes cool 15 minutes in the pan and bowls, then unmold onto racks to cool completely.

Ingredients for Frosting and Decorations:

1 1/2 cups sugar
1/2 teaspoon cream of tartar
Pinch of salt
3 large egg whites
1/2 teaspoon vanilla extract
1/4 teaspoon almond extract
1 teaspoon yellow food coloring
Yellow sanding sugar, for coating
black piping frosting

Directions for building the cake:

Trim the flat sides of the bowl cakes with a serrated knife to make level. They may have gotten a little uneven on top while baking. You want them flat so it's easy to stack. Using a chef's knife, cut the 4 corners off the rectangular cake and set aside three of the cake triangles for the tail and beak.

Put the flat cake on a cake board or platter and use toothpicks to attach two cake triangles to a short end for the tail. Position the large bowl cake on the flat cake as shown, then top with the small bowl cake; insert a skewer through the cakes to secure. Trim another cake triangle to make a beak; attach to the small bowl cake with toothpicks.

Make the frosting:

Heat the sugar with the cream of tartar, salt and 2/3 cup water in a saucepan, stirring, until dissolved. Beat the egg whites with a mixer until frothy. Slowly, seriously slowly, beat in the hot sugar mixture, then increase the mixer speed and beat until stiff peaks form, about 7 minutes. Beat in the vanilla and almond extracts and the food coloring.

Cover the cake with a thick layer of the yellow frosting, using the frosting to sculpt a rounded chick shape. This frosting actually works really great for shaping. With the edge of an offset spatula, use some frosting to extend the beak and tail. Coat the cake with yellow sanding sugar. Refrigerate, uncovered, 15 minutes. Draw circles/ovals for the eyes with black frosting. Remove the skewer and toothpicks as you cut the cake.


Good Luck.