Monday, March 12, 2012

Irish Soda Bread


I just thought you would like to know that my family is not Irish, even though my younger brother Dave has a red beard. It's weird actually, because he has dark brown hair on his head. His red beard remains a mystery... Anyway, in our house growing up we always celebrated St. Patrick's Day, but it might have had to do with the fact that it was my older brother's birthday. I remember seeing this one specific picture of my brother Ryan when he was like three or something, and he was sitting next to a big round cake with a giant leprechaun frosted on it. The happy leprechaun had a huge red beard, green hat and was smoking a pipe. I really do hope that I am remembering that picture correctly and didn't just make that up. What a weird thing to imagine. Moving on.

Last week I asked my brother what kind of treat he would like me to make him on his St. Patrick's Day birthday, and he said anything with rhubarb. Ya know, I had big plans for some sort of stout cake with Irish cream frosting, or something St. Patty's Day themed, but he had to go and ruin everything since it's his birthday or whatever. I kid, I kid. On St. Patrick's Day I will be using frozen rhubarb, because I can't find it fresh, and making my brother a rhubarb bar that I will be concocting all on my own. Wish the both of us luck. Maybe some Irish luck, that's good, right?

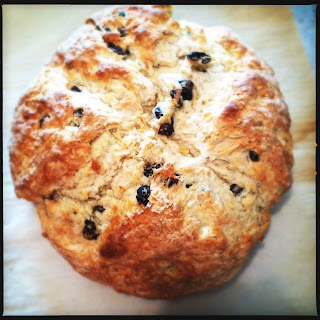
Since I love all holidays, I couldn't go through this one without making some sort of traditional Irish treat. I've been hearing people talk about Irish Soda Bread for a while now, so I thought I would finally give it a try. It turned out to be the easiest bread I've ever made, with maybe the exception of banana bread. I was incredibly excited about it because it ended up tasting so good, especially warm out of the oven with a little butter on it. I prefer the full-fat unsalted butter to accompany my bread, yup. I was even more excited about this stuff when it was cooled and I could slice it perfectly. This bread was toaster ready, man. I will definitely be keeping this recipe and making this Irish Soda Bread again. This recipe was so easy to understand and follow through with. I hope you get a chance to make it within the next week to get in the holiday spirit. Enjoy!


Irish Soda Bread
Adapted from Saveur

4 cups flour
2 tablespoons sugar
1 teaspoon salt
1 teaspoon baking soda
4 tablespoons butter, cubed
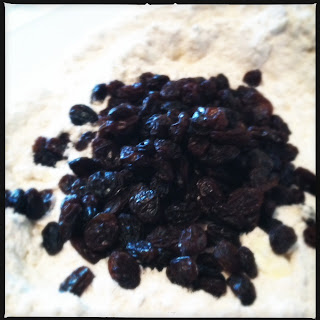
1 cup raisins
1 egg, lightly beaten
2 cups buttermilk

Preheat your oven to 425°. Sift together the flour, sugar, salt, and baking soda into a large mixing bowl. I recently found out how much of a difference sifting actually makes. I'll never skip this step again.

Using a pastry cutter or two knives or your fingers if you'd like, work butter into flour mixture until it resembles coarse meal, then stir in raisins. You could also use golden raisins or currants if you'd like. It just depends on your taste.


Make a well in the center of the flour mixture. Add beaten egg and buttermilk to well and mix in with a wooden spoon or spatula until dough is too stiff to stir. Dust hands with some flour, and then gently knead dough in the bowl just long enough to form a rough ball. Transfer dough to a lightly floured surface and shape into a round loaf.


Transfer dough to a baking sheet with parchment paper. Using a serrated knife or bench knife, score top of dough about 1/2'' deep in an "X" shape. Transfer to oven and bake until bread is golden and bottom sounds hollow when tapped with a knife, about 40- 50 minutes. Transfer bread to a rack to let cool briefly. Serve bread warm, at room temperature, or sliced and toasted.

Sunday, March 4, 2012

Blood Orange Sandwich Cookies


I'm not quite sure if I should be embarrassed by this or not, but I had never tasted a blood orange until this year. I've seen them before, like in the opening credits for the show Dexter, but never had tried one myself. Until, thanks to my pal, Kelsey, I enjoyed freshly squeezed blood orange juice from her new juicer! Thanks for getting me hooked, lady. These oranges are more tart and a little more messy, but they are my new favorite orange. I wanted to bake with them while I had a a giant bag around the house. I decided on a sandwich cookie that had a flavored cream in the middle. I made the right decision, folks. This cookie is good and really rich. One of these cookies will cure any sort of sweet tooth you may be having.

While cutting these oranges you may want to lay down parchment paper or something because they squirt everywhere and the juice is blood red. Sooooo, don't wear white. I've warned you now, so proceed with caution. Don't get me wrong, the juice won't be splattering your walls like blood, but a few several drops will squirt out! These cookies aren't difficult to get done. The hardest part is maybe rolling out the dough, but even that isn't too difficult. Just make sure you keep your surface floured and don't roll the dough too thin. I also think that the cream turned out to be a really pretty pink from the dark red juice. Hope you get a chance to make these, they are worth the effort!


Blood Orange Sandwich Cookies
Adapted from Martha Stewart

Ingredients for cookie:
Grated zest of 2 blood oranges
1/4 cup freshly squeezed blood orange juice
1 cup sugar
1 1/2 cups all-purpose flour, plus more for work surface
3/4 cup cake flour (not self-rising)
1 teaspoon baking powder
1/2 teaspoon salt
1/2 cup (1 stick) unsalted butter, room temperature
2 large egg yolks

Ingredients for blood orange cream filling:
1/2 cup (1 stick) unsalted butter, softened
2 cups confectioners' sugar
1 tablespoon honey
3 tablespoons freshly squeezed blood orange juice

Directions for cookie:
Preheat oven to 350 degrees. Line a baking sheet with parchment paper, set aside. In a small bowl, combine blood orange zest with 1 tablespoon sugar, set aside. In a medium bowl, whisk together both flours, baking powder, and salt, set aside.

In the bowl of an electric mixer, beat butter and remaining sugar on medium speed until light and fluffy, about 2 minutes, scraping down sides of bowl if you need to. Add egg yolks, and beat until combined, scraping down sides of bowl. Beat in zest-sugar mixture that you have set aside, then add flour mixture in two batches, alternating with the juice, and beat to combine.

Turn out dough onto a piece of plastic wrap, and shape into a 1-inch-thick disk. Wrap it up in plastic, and refrigerate until firm, about 30 minutes. You can also throw it in the freezer for half that time.

On a lightly floured work surface, roll out disk to 1/8 inch thick. Using a round cookie cutter, cut out rounds and place about 1 inch apart on prepared sheet. Bake, rotating sheet halfway through, until edges are golden, 15 to 18 minutes. Transfer sheet to a wire rack to cool 5 minutes. Transfer parchment paper and cookies to rack to cool completely.
Using an offset spatula, spread 1 tablespoon filling onto flat sides of half the cookies. Sandwich with remaining cookies, keeping flat sides down.

Directions for cream filling:
In the bowl of an electric mixer, beat butter and sugar until light and fluffy, about 4 minutes. Also, before you but in the confectioners' sugar I would sift it first just to make sure there won't be any lumps. That way your frosting won't get over-mixed. Next, beat in honey. Add blood orange juice, 1 tablespoon at a time, until filling holds together and is smooth and creamy, about 2 minutes. Then you can transfer the cream to a small bowl, cover it, and set aside until ready to use.


*Oh! One more thing, you can keep these cookies refrigerated for up to 3 days! Enjoy.